Perfect Bird house plans for kids!
This birdhouse was made by my 8 year old daughter Isabelle.

This birdhouse was made by my 7 year old daughter Elaina.

Build this easy log cabin bird house from reclaimed wood

With these log cabin bird house plans.
You can build this great project with your kids.

They can nail and glue the pieces together if you pre cut everything. I helped my kids 4-h group build them. They had a lot of fun.
No two birdhouses were the same. Some of the students only used 4 layers of logs while others used 6. Some used the shiny side of the metal roofing while others used the rusty side.
Some of the kids put the fresh cut side of the logs out, and others showed off the weathered side of the barn wood.
The kids also got quite creative building all sorts of different perches for the birds.
I was really surprised how much creativity the kids showed in their projects!
So here is what material you need before you get started.
1.Reclaimed barn siding wood scraps.
2.Reclaimed corrugated tin.
3.Some fencing wire.
4.Wood glue, nails, and screws
Here are the tools needed to prepare or pre cut the pieces for the kids.
1.Table saw to rip your scrap wood to 1”x1” pieces
2.Miter saw to cut them to length
3.Tin snips to cut the tin.
4.Drill and bits.
Here are the tools the kids will need to assemble their birdhouses.
1.Hammer
2.Gloves
3.Safety glasses
That’s basically it. You will need a cordless drill to help the kids screw the corrugated roof in place.
So here is what you need to do.
Plan Ahead! Make sure you have all the pieces cut well before the kids arrive to build their project. I prepared enough wood for about 25 bird houses. It took me the better part of a day.
Ok. Lets get cutting….
Wait a minute, PUT YOUR SAFTEY GLASSES ON!
Got ‘em on? Ok lets get started.
Set your fence on your table saw 1 inch from the blade. Rip your wood before you cut it to length! It is much easier to rip longer pieces…and it keeps your precious digits farther from the blade!
Now its time to cut them to length.
For each birdhouse you will need to cut.
12 pieces 1×1 or 3/4×3/4 6 inches long 12 pieces 1×1 or 3/4×3/4 8 inches long 2 pieces 1×1 or 3/4×3/4 2 inches long 2 pieces 1×1 or 3/4×3/4 3 inches long
*It is a good idea to cut a few extra pieces for perches or other accessories. The kids will come up with all kinds of creative things to do with these extra pieces.
These are the logs of your birdhouse. You will also need
1 piece about 8 inches wide and 12 inches long. This will be the base of your birdhouse.
Now cut 2 pieces 8 inches long with 45 degree angles for the roof. Now cut a piece of reclaimed tin 10 inches X 16 inches.
All done? Great, you are ready to start building.
Building the birdhouse
1.On your 8×12 base piece attach with nails and glue one of your 8” logs on the face of your board at one end.
2. Next attach 2 6” logs on the base along the edges.
3.Now another 8” log should go along the front of the 2 6” logs You should now have one layer of logs. Keep building this way being sure to alternate a 6” log goes on top of an 8” log, 8” on top of a 6” and so forth.

5.To make an entry door for the birds you can replace one of the 6” pieces with 2 2” pieces and/or replace one 8” log with 2 3” logs. This will give you a 2”X2” door. (you may also build the entire house with 6 and 8 inch long logs and drill a hole for the door later. If you do be careful, a spade bit can catch the logs and split them apart.)

6.Now it is time to attach your roof support pieces. Use 2 2 ½ inch long screws for each and screw them on top of opposing walls of your birdhouse.


7.Next attach your tin roof to the top with screws. It helps to drill holes in the tin first for the screws to go through.
8.Now drill 2 small holes on each end of the roof peak. Run each end of your wire through the holes you drilled, bend them up to form a loop.
9.Now add any accessories you would like such as a perch.
Congratulations, on building your very own log cabin birdhouse!
Read More about Post and Beam Barn Kits below.
How to Save $15,000 Building Your Own Barn: A Complete DIY Guide
40x50 Horse Barn Style Barndominium Building your own barn can save you serious money - we're talking about $15,000 or more in labor costs alone. But before you grab your hammer and start swinging, there are some important realities to consider about DIY barn...
How to Store Lumber to Prevent Warping
Learn how to store lumber effectively to prevent warping, ensuring your wood remains stable and ready for your next project.
How to Use Local Lumber to Cut Barn Costs
Learn how using local lumber for barn construction can save money, reduce environmental impact, and support your community.
Mortise and Tenon vs. Steel Plate Joinery in Timber Frames: What DIY Builders Need to Know
Explore the differences between mortise and tenon joints and steel plate connections in timber framing, focusing on strength, aesthetics, and construction methods.
Checklist for Hiring a Barn Contractor
Learn how to hire the right barn contractor with essential tips on credentials, reputation, bids, and communication for a successful project.
How to start a barn wedding venue business
Learn how to successfully launch a barn wedding venue business, from planning and renovations to legal requirements and marketing strategies.
Is it worth while to have a local sawmill cut some or all of my Barn Lumber or even do it myself?
We have a LOT of eastern red cedars, Tulip Poplars, among other species. If I have a local sawmill cut our pieces for us, would you expect a significant savings overall?
Pride and Accomplishment in Having Built a Barn Myself
Besides the utility of having a barn and the value it adds to our property, having built the barn myself has given me a sense of pride and accomplishment that’s hard to place a value upon.
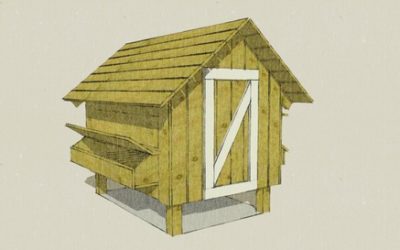
Free Chicken Coop Plans
You can build this hen house with these free chicken coop plans. It is easy to do. All you need is some rough cut lumber, a hammer, nails, and a circular saw. You can even build one with regular dimensional lumber from your local lumber yard. I built one like this for...

